Best roof rack for carrying a kayak
There's nothing quite like the freedom of launching your kayak onto a pristine Nevada lake or river, but the journey to get it there can often feel like the biggest challenge. Wrestling a bulky fishing kayak onto the roof of your vehicle can be a back-breaking, frustration-inducing task, making you wonder if the peaceful paddle is worth the struggle. This comprehensive guide is here to help you navigate the often-confusing world of roof racks, ensuring you find the best system for safely and easily transporting your kayak, so you can spend less time struggling and more time fishing.
Understanding the Foundation: Your Vehicle's Roof and Crossbars
Before you even think about kayak carriers, you need to understand the fundamental base upon which everything else rests: your vehicle's roof and its crossbars. Many folks jump straight to a fancy carrier without realizing their vehicle might not be set up for it, leading to wasted money and a whole lot of head-scratching. Getting this part right is crucial for both safety and convenience, especially when you're driving long distances across Nevada's highways to a spot like Lake Mead or Pyramid Lake.
OEM vs. Aftermarket Crossbar Systems: What You Need to Know
Your car might come with roof rails running front-to-back, but those aren't enough on their own. You need crossbars, which run side-to-side, perpendicular to the length of your vehicle. These are the unsung heroes that provide the actual support for your kayak. You'll generally encounter two types: Original Equipment Manufacturer (OEM) crossbars, which are made by your vehicle's manufacturer, and aftermarket systems from specialized brands.
OEM crossbars often look seamlessly integrated with your vehicle's design, which is aesthetically pleasing. They're usually designed to fit perfectly and can be very sturdy. However, they might be more expensive, and their load capacity or compatibility with certain kayak carriers can sometimes be limited. For instance, some OEM bars might be too wide or have an unusual shape that doesn't play well with all universal kayak attachments.
Aftermarket crossbar systems, like those from Thule or Yakima, are incredibly popular for a reason. They offer a vast range of options designed to fit almost any vehicle, whether it has factory side rails, naked roofs, or even rain gutters. These systems are typically modular, consisting of specific "feet" that attach to your roof, and then the crossbars themselves, which come in various shapes (round, square, aero blade) and lengths. The beauty of aftermarket systems is their versatility and often higher weight capacities, which is a real plus if you're hauling a heavier fishing kayak packed with gear. When you're heading out for a big trip, say to Wildhorse Reservoir Nevada Fishing Guide, having robust crossbars is non-negotiable.
Measuring for Compatibility: Ensuring a Secure Fit
This isn't just about looking good; it's about making sure your rack system can handle the weight and dimensions of your kayak and your vehicle. The last thing you want is a wobbly setup that risks damaging your boat or, worse, causing an accident on I-80. First, check your vehicle's owner's manual for the maximum dynamic load capacity for the roof. This is the weight your roof can safely carry while the vehicle is in motion. Don't eyeball it; this number is critical.
Next, measure your kayak. Note its length, width, and weight. A tandem fishing kayak is going to be a very different beast to transport than a recreational sit-on-top. Consider the width of your crossbars and how far apart they are on your roof. Wider crossbars generally offer more stability, which is especially important for wider fishing kayaks. The distance between your front and rear crossbars also affects stability. A longer spread provides more support and minimizes sway, which can be a real issue with Nevada's sometimes gusty winds, particularly when crossing open desert stretches. Remember that if your crossbars are too close together, your kayak could pivot more easily, creating a dangerous situation.
Popular Kayak Carrier Styles: Finding Your Perfect Match
Once you have your crossbar system figured out, it's time to choose the actual kayak carrier. This is where personal preference, kayak type, and ease of use really come into play. Each style has its pros and cons, and what works best for one angler might be a nightmare for another.
J-Cradle Carriers: Secure and Space-Saving
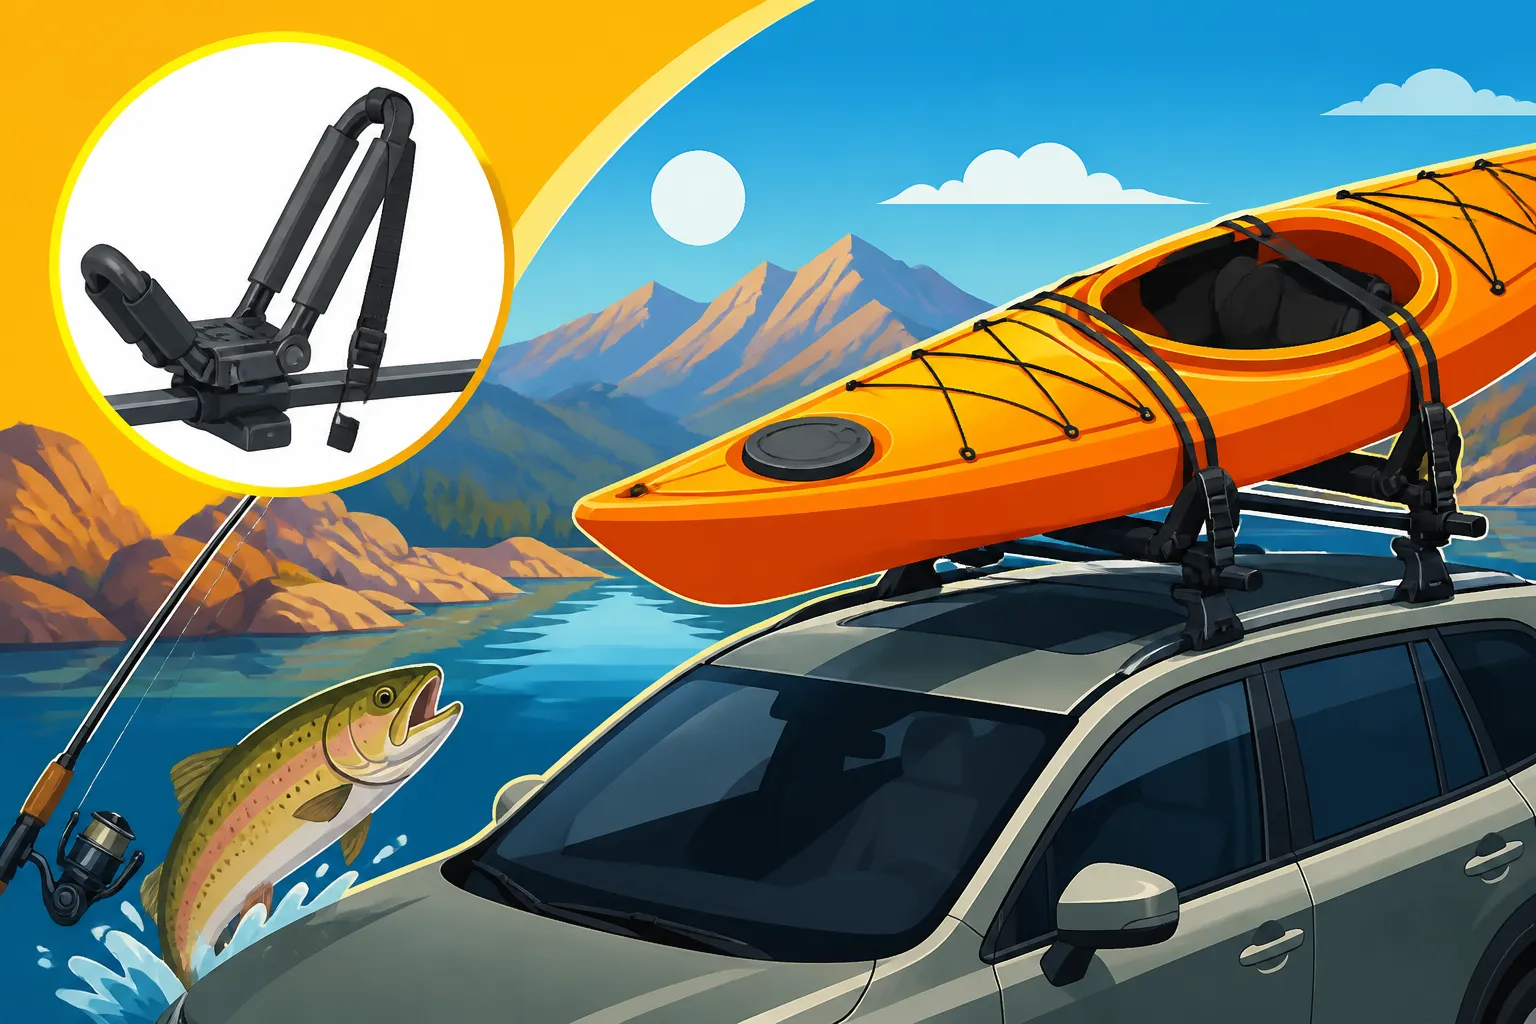
J-cradle carriers are one of the most common and recognizable types of kayak racks. They get their name from their "J" shape, which cradles the kayak on its side, providing excellent support. The main advantage here is security and space efficiency. By carrying the kayak on its side, you typically have room on your crossbars for a second kayak, a cargo box, or even another piece of gear. This is fantastic if you're heading out with a buddy or bringing extra camping equipment for a multi-day fishing trip to Best Places to Fish in Nevada.
Loading a kayak into a J-cradle usually involves lifting one end onto the cradle, then walking around to lift the other end and gently sliding it into place. While this might require a bit of strength, especially with heavier fishing kayaks, many J-cradles come with loading ramps or assisted lift features that can make the process much smoother. Always secure your kayak with straps that go over the hull and attach to the crossbars, and use bow and stern tie-downs that connect to your vehicle's frame. For anyone who has ever seen a kayak flapping dangerously on the highway, you know those tie-downs are non-negotiable.
Saddle-Style Carriers: Gentle Support for Your Hull
Saddle-style carriers consist of four padded supports, or "saddles," that conform to the shape of your kayak's hull, carrying it flat or nearly flat on its bottom. This method distributes the weight more evenly across the kayak's surface, which can be particularly beneficial for delicate composite kayaks or those with unique hull shapes that might not sit well in a J-cradle. It's often considered a gentler way to transport your boat, minimizing pressure points.
Loading a kayak onto saddle carriers typically requires a bit more overhead lifting since you're placing it flat. However, many saddle systems are designed to slide or pivot, allowing you to load from the side of your vehicle and then push the kayak onto the roof. This can be a huge help if you're a solo angler or if your vehicle is particularly tall. Just like with J-cradles, straps over the hull and bow/stern tie-downs are absolutely essential for a safe journey, especially across open, windy areas where a rogue gust could shift an unsecured boat.
Stacker Systems: Maximizing Multi-Kayak Transport
If your fishing crew is growing, or you simply own multiple kayaks (a river kayak and a lake kayak, perhaps?), a stacker system might be your best bet. These carriers allow you to transport multiple kayaks (often up to four) on their sides, stacked vertically. They typically consist of a tall, upright bar that attaches to your crossbars, with padded arms or posts that kayaks lean against.
The main benefit of stackers is their incredible space efficiency. You can fit a surprising number of kayaks across your roof, making them ideal for family outings or group fishing trips. The downside, however, is that loading can be more challenging. You'll need to lift each kayak quite high to get it into position, and then meticulously strap each one down individually. This often requires two people, especially for larger fishing kayaks. If you're planning a trip where multiple kayaks are a must, perhaps to different fishing holes mentioned in Nevada Fishing Spots by Region, a stacker system offers unparalleled capacity. Just remember, secure them all properly!
Loading and Unloading Aids: Making Life Easier
Let's be honest: lifting a 70-pound fishing kayak onto the roof of an SUV or truck can be a real workout. That's where loading and unloading aids become your best friends. These clever accessories are designed to take some of the grunt work out of the process, preventing scratches, strains, and frustration.
Some popular aids include:
- Roller extenders: These attach to the rear of your crossbars and extend backward, allowing you to rest the bow of your kayak on them and slide the boat forward onto the roof. It's a game-changer for solo loading.
- Load-assist systems: Brands like Thule and Yakima offer sophisticated systems with gas struts or sliding arms that lower one side of the carrier, allowing you to load the kayak at waist height, then gently lift and pivot it onto the roof. These are truly fantastic for heavier kayaks or taller vehicles but often come with a higher price tag.
- Suction cup rollers: A more portable option, these rollers attach with suction cups to the rear window or roof of your vehicle, creating a temporary rolling surface to help slide the kayak up. While not as robust as permanent systems, they're a good option for occasional use or when you need flexibility.
Investing in a good loading aid can drastically improve your overall fishing experience, making you more likely to hit the water more often without dreading the transport.
| Carrier Type | Primary Benefit | Kayak Position | Ease of Loading | Capacity (typical) | Best For |
|---|---|---|---|---|---|
| J-Cradle | Space-saving, secure | On its side (angled) | Moderate | 1-2 kayaks | Anglers with 1-2 kayaks, needing extra space |
| Saddle-Style | Hull protection, stable | Flat on bottom/deck | Moderate (lift) | 1 kayak | Delicate hulls, solo anglers (with aids) |
| Stacker | Max capacity | On its side (vertical) | Challenging | 2-4 kayaks | Multiple kayaks, group trips |
Crucial Considerations for Nevada Anglers
Nevada's unique environment presents specific challenges and opportunities for anglers. From blazing summer heat to powerful winds and vast distances between fishing spots, your roof rack needs to be up to the task. What works fine in a mild, coastal climate might completely fail in the Silver State.
Durability and Weather Resistance for Desert Conditions
Let's face it: Nevada weather can be brutal. Extreme UV radiation from the sun, wide temperature swings, and the occasional dust storm can take a toll on gear. This means you need a roof rack system built to withstand these harsh conditions. Look for materials that are UV-resistant and corrosion-resistant. Aluminum is an excellent choice for crossbars and carrier frames due to its strength-to-weight ratio and resistance to rust. Steel is also robust but heavier and can rust if not properly coated. Plastic components should be heavy-duty and formulated to resist sun damage and cracking over time.
Think about the straps, too. Cheap nylon straps can degrade quickly in the sun, becoming brittle and unreliable. Opt for heavy-duty, UV-resistant straps with strong, non-marring buckles. While you might find budget options on online marketplaces like Amazon, sometimes it's worth investing a bit more in a brand known for quality materials and construction. The last thing you want is a strap failing mid-trip to Lake Mohave Nevada Fishing Guide because the sun has cooked it beyond its limits. Regular inspection of all components for wear and tear is vital.
Security Features: Protecting Your Investment
Your fishing kayak is an investment, often carrying hundreds, if not thousands, of dollars worth of gear. Leaving it unsecured on your roof, even for a short stop for gas or a quick bite to eat, is an invitation for theft. Modern roof rack systems offer various security features that are well worth considering.
Many aftermarket crossbar systems and kayak carriers include integrated lock cylinders. These allow you to lock the rack system to your vehicle's roof and then lock the kayak carrier to the crossbars. Some systems even incorporate lockable straps or cables that physically secure the kayak to the carrier. While no system is 100% foolproof against a determined thief, these features act as a significant deterrent and buy you precious time. Always use locking mechanisms whenever your kayak is on the roof, especially when parked overnight at a trailhead or boat launch. It’s also good practice to remove any valuable fishing rods, tackle boxes, or electronics from your kayak itself when you leave it unattended.
Aerodynamics and Fuel Efficiency for Long Drives
Nevada is a big state, and fishing spots are often far apart. This means you'll be spending a fair amount of time on the highway, and an inefficient roof rack can significantly impact your vehicle's fuel economy. A poorly designed rack, or one that's incorrectly installed, can create excessive drag and wind noise, turning a pleasant drive into an annoying one.
Modern aerodynamic crossbar designs (often shaped like a wing) and sleek kayak carriers are designed to minimize wind resistance. While they might cost a bit more upfront, the fuel savings over years of use, especially with Nevada's long driving distances, can add up. Consider a system that allows for easy removal of the kayak carriers when not in use, further reducing drag. When driving at higher speeds, particularly if you're battling a headwind across the desert, a noisy, drag-heavy rack will be very noticeable. Pay attention to how the kayak itself sits on the carrier – a wider, flatter profile will generally create more drag than one sitting on its side in a J-cradle.
Installation, Maintenance, and Safe Kayak Transport Practices
Even the best roof rack system is only as good as its installation and the care you put into it. Proper setup and adherence to safety guidelines are paramount, not just for the life of your gear, but for everyone's safety on the road.
Step-by-Step Installation: Getting it Right the First Time
While some systems might seem intimidating, most modern roof racks and kayak carriers are designed for DIY installation. However, it's crucial to follow the manufacturer's instructions to the letter. Don't skip steps, and don't assume you know better. Most systems involve attaching specific "feet" to your vehicle's roof (often using clamps, bolts, or flush mount systems), then securing the crossbars to these feet. The kayak carriers then mount onto the crossbars.
Here’s a general sequence:
- Read the manual: Seriously, every single word.
- Clean your roof: Remove any dirt or debris that could interfere with a secure attachment or scratch your paint.
- Assemble the feet and crossbars: Do this on the ground first, making sure all bolts are hand-tight.
- Mount to the vehicle: Carefully place the assembled crossbar system onto your roof according to the vehicle-specific instructions.
- Tighten everything: Use the provided tools (often a torque wrench or specific Allen keys) to tighten all fasteners to the exact specifications. Over-tightening can damage your vehicle or the rack; under-tightening can lead to disaster.
- Install kayak carriers: Attach your J-cradles, saddles, or stackers to the crossbars, again following the instructions precisely.
- Test the fit: Give the entire system a good shake. It should feel rock-solid with no discernible wobble.
If you're ever unsure, especially if you have a naked roof that requires a more complex "door jamb" style attachment, consider having a professional shop install it. Shops like Bass Pro Shops often offer installation services for many popular brands.
Ongoing Maintenance for Longevity
Your roof rack system works hard for you, battling the elements and supporting heavy loads. A little ongoing maintenance goes a long way in ensuring its longevity and continued safety.
- Regular inspection: Before every trip, give all components a once-over. Check straps for fraying, buckles for damage, and all bolts for tightness. This is especially important if you leave your rack on the car year-round. The vibrations from driving and exposure to the elements can loosen fasteners over time.
- Cleaning: Dust, grime, and road salt (if you happen to drive in winter conditions or areas that use it) can accumulate. Clean your rack periodically with mild soap and water. Pay attention to moving parts and locking mechanisms.
- Lubrication: If your rack has moving parts or locking cylinders, a little dry lubricant (like graphite for locks) can keep them operating smoothly.
- Storage: If you remove your rack when not in use, store it in a dry place away from direct sunlight. This protects plastic and rubber components from unnecessary UV exposure and extends their life.
Good maintenance habits not only prevent failures but also extend the life of your investment, ensuring your rack is ready for every adventure, from the tranquil waters of Floyd Lamb Park Fishing Ponds to the expansive Lake Tahoe Nevada Fishing Guide.
Essential Safety Tips for Hauling Your Kayak
Proper loading and securing of your kayak are paramount. A loose kayak is not only a danger to itself but also to other drivers.
- Centering and Balance: Always try to center your kayak on the crossbars, distributing the weight evenly. This prevents undue stress on one side of the rack or vehicle and improves stability.
- Secure Strapping: Use high-quality, cam-buckle straps (never ratchet straps, which can over-tighten and damage your kayak) to secure the kayak tightly to the carriers and crossbars. Ensure the straps are snug but not so tight that they deform the hull.
- Bow and Stern Tie-Downs: This is the most frequently overlooked safety step, and arguably the most important. Always, always, always use bow and stern tie-downs. These straps connect the front and rear of your kayak to stable points on your vehicle's frame (usually tow hooks or specialized hood/trunk loops). They prevent your kayak from lifting, shifting, or becoming a projectile if you have to brake suddenly or hit a large bump. These are absolute lifesavers, particularly when driving through the strong crosswinds that can whip across the Nevada desert.
- Flagging Overhangs: If your kayak extends more than four feet past the rear of your vehicle, you'll need to attach a brightly colored flag (red or orange) to the furthest point. This is a legal requirement in many places and a smart safety practice to make your extended load visible to others.
- Check Periodically: For longer trips, pull over after about 15-20 miles to double-check all straps and tie-downs. Road vibrations can sometimes cause things to shift slightly. Then, check again every couple of hours or after particularly rough roads.
- Drive Cautiously: Remember you have a large object on your roof. Adjust your driving habits: slow down, especially around corners or in strong winds, increase your following distance, and be mindful of low clearances (like drive-thrus or parking garages).
By following these guidelines, you'll ensure your kayak arrives at your fishing destination safely and securely, ready for your next adventure. Taking the time to do it right means more peace of mind on the road and more enjoyment on the water. For more information on safely transporting your watercraft, check out Nevada Boat Registration for Anglers or Nevada Boater Education Card Requirement. You might also find tips in Best way to transport a kayak without a roof rack for alternative methods if a roof rack isn't your primary choice.
Choosing the Right Rack for Your Kayak and Vehicle
Bringing all these considerations together, the "best" roof rack isn't a one-size-fits-all solution. It's the one that perfectly matches your kayak, your vehicle, your fishing habits, and your budget.
Kayak Type: Fishing Kayak vs. Recreational Kayak
The type of kayak you own dramatically influences your rack choice. Fishing kayaks are typically wider, heavier, and often have more intricate hull designs (like tunnel hulls for standing stability) compared to slender recreational kayaks.
- For heavy, wide fishing kayaks: You'll need a robust system with a high weight capacity. Saddle-style carriers often provide excellent support for wider hulls, distributing weight evenly. Some larger fishing kayaks might struggle to fit into narrower J-cradles. Load-assist features are practically a necessity for heavier boats, especially if you're loading solo.
- For recreational kayaks: These are generally lighter and narrower, making them easier to handle. J-cradles are a popular choice as they free up space. Stacker systems are great if you're hauling multiple recreational kayaks for a family day on the water.
- For inflatable kayaks: While you can often just deflate and pack these, if you prefer to transport an inflated one, any standard rack system will work as they are generally lighter. However, ensure they are securely strapped down and won't get punctured by any sharp edges.
Consider the dimensions of your specific kayak. Does it have a rudder that extends? Any unique features that might interfere with how it sits on a carrier? Think about how often you fish and how much effort you're willing to expend on loading and unloading. If you're out every weekend, ease of use becomes a much higher priority.
Vehicle Type: Sedan, SUV, Truck, or Van
Your vehicle is the other half of the equation. Sedans, SUVs, trucks, and vans all present different roof rack challenges and solutions.
- Sedans: Often have naked roofs or simple door jamb mounts. You'll likely need an aftermarket crossbar system with specific "fit kits" for your car. Sedan roofs tend to be lower, which can make loading easier, but also shorter, which might mean your crossbar spread is limited.
- SUVs and Wagons: Many come with factory side rails, making crossbar installation straightforward. SUVs, especially taller ones, might benefit greatly from load-assist kayak carriers. The longer roofline usually allows for a wider crossbar spread, providing more stability for longer kayaks.
- Trucks: You have options! While some trucks can accommodate roof racks over the cab (especially those with extended cabs), many anglers opt for bed-mounted kayak racks or racks that extend over the cab and bed. These can be excellent for long, heavy fishing kayaks, keeping them lower to the ground for easier loading. Just make sure your chosen system doesn't interfere with your truck's bed usage. This can be a great option for those who use their truck for hauling other Nevada Fishing Gear Essentials or for camping trips.
- Vans: Similar to SUVs, but often with even longer rooflines, offering excellent crossbar spread. Loading can still be high, so load-assist features are beneficial.
Always double-check your vehicle's specific roof type and recommended load capacity.
Budget Considerations: Where to Invest and Where to Save
Roof rack systems can range from a few hundred dollars to well over a thousand, depending on the brand, features, and materials. It's tempting to go for the cheapest option, but remember the durability and safety aspects mentioned earlier.
- Entry-level (often under $300-$400): You might find basic crossbar systems and simple J-cradles or foam blocks. These are often fine for occasional use with lighter kayaks but might lack advanced security features, durable materials, or load-assist options. You can find some serviceable entry-level options on platforms like Amazon.
- Mid-range ($400-$800): This is where you start to get into reputable aftermarket brands offering more robust crossbars, aerodynamic designs, and good quality kayak carriers. You'll likely find integrated locks and better strap materials here. This is often the sweet spot for many anglers, offering a good balance of features and value. Bass Pro Shops often carries a wide range of these options.
- High-end ($800+): These systems include advanced load-assist features, premium materials, and fully integrated locking systems across all components. They are designed for frequent use, heavy kayaks, and maximum convenience and security. If you're a serious angler who spends a lot of time on the water, this investment can pay dividends in ease of use and peace of mind.
Think of it as an investment in protecting your kayak and making your fishing trips more enjoyable. Sometimes, spending a little more upfront saves you a lot of headache (and potential damage) down the road. Also, consider the long-term. If you plan to keep your vehicle and kayak for many years, a more durable system will undoubtedly be more cost-effective in the long run.
Disclaimer
This article is for general informational purposes only and does not constitute professional advice. Laws, prices and regulations vary by location and change over time. Consult a qualified professional for guidance on your specific situation.